🚀 Getting Started
☁️ Cloud Server
Use Cloud Server mode when your device has dynamic or shared IP addresses. If the device is not registered yet, starting the service opens a registration dialog - confirm the default Sign Up tab and a new account is created automatically; no email, phone number, or manual credential entry is required.
Key Features ⚡
- 🌐 Automatic account creation via the Sign Up tab of the registration dialog
- 🔄 Hybrid push-pull architecture
- ⏱️ Dynamic and shared device IP support
- 🔒 Basic authentication
Requirements ⚠️
- Requires Google Play Services for Firebase Cloud Messaging (FCM) push notifications
- Provides a Server-Sent Events (SSE) fallback for devices without Play Services
- Needs active internet connection
Message Flow 📨
sequenceDiagram
    participant API
    participant Server
    participant FCM
    participant Device

    API->>Server: POST /messages
    Server->>Server: Store in DB
    par Notification Flow
        alt Firebase Cloud Messaging
            Server->>FCM: Send push notification
            FCM->>Device: Deliver FCM message
        else Server-Sent Events
            Server->>Device: Send event
        end
        Device->>Server: Get messages
        Server->>Device: Return messages
    and Scheduled Polling
        loop Every 15 minutes
            Device->>Server: Get messages (polling)
            Server->>Device: Return messages
        end
    end

    Device->>Device: Process SMS
    Device->>Server: Report message status
Server->>API: Webhook notification (optional)graph LR
A[API Request] --> B[Server]
B --> C[FCM]
C --> D[Device]
D --> E[Retrieve Messages]- Instant delivery via Firebase
- Primary message channel
graph LR
    A[API Request] --> B[Server]
    B -->|SSE connection| C[Device]
C --> D[Retrieve Messages]- Fallback when FCM is unavailable
- Persistent connection for real-time events
- Shows persistent notification on device during operation
- May increase battery consumption due to the long-lived connection
graph LR
    A[Device] --> B{Every 15min}
    B --> C[Check Server]
C --> D[Get Messages]- Fallback mechanism
- Ensures message delivery
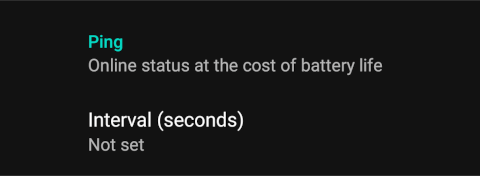
- Configurable check interval
- May increase battery consumption
Notification Channel Selection 🔔
The app allows you to control which notification channel is used:
| Mode | Description |
|---|---|
| Auto | Uses FCM when available, falls back to SSE (default) |
| SSE Only | Forces Server-Sent Events, bypassing FCM entirely |
When to use SSE Only:
 Enterprise environments where FCM is restricted by firewall policies
 Devices without Google Play Services (e.g., Chinese devices, custom ROMs)
 Privacy-focused deployments wanting to avoid Google services
 Testing SSE functionality
Configuration:
Change the notification channel in the app settings:
- Navigate to Settings → Cloud Server
- Find Notification Channel option
- Select Auto or SSE Only
- Restart the app to apply changes
Important: SSE Only mode maintains a persistent HTTP connection, which may increase battery consumption and shows a persistent notification in the status bar.
How to Use 🛠️
-
Activate Cloud Mode
Launch app → Toggle "Cloud Server" -
Start the Service
Tap Start Service on the Home tab. If the device is not registered yet, a registration dialog opens with three tabs: Sign Up (default), Sign In, and By Code. Keep the default Sign Up tab and confirm - a new anonymous account is created automatically. Once connected, the button changes to Stop Service. -
Get Credentials
Credentials will be automatically generated and appear in the Cloud Server section after successful connection:
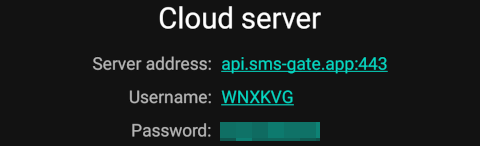
Automatic Registration
After you confirm the default **Sign Up** tab in the registration dialog (see step 2), username and password are generated automatically - no manual credential entry is required.
Web Dashboard
You can also log in at **`https://dashboard.sms-gate.app`** with these credentials to manage messages, devices, webhooks, and settings through a graphical web interface. See the [Web Dashboard](../services/web-dashboard.md) guide for details.
-
Send Message